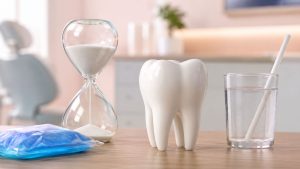
Investing in a custom mouth splint is a smart move for your oral health, but its effectiveness hinges on one simple thing: keeping it clean. A dirty splint can quickly become a haven for bacteria, leading to bad breath, discolouration, and even bigger oral health issues down the track.
The key to a long-lasting, hygienic splint is a consistent cleaning routine, covering both daily upkeep and a regular deep clean.
Your Guide to a Sparkling Clean Mouth Splint

It helps to think of your splint as an extension of your teeth. You brush your teeth every day to get rid of plaque, and your splint needs that same daily attention to stay safe and effective. If you neglect it, bacteria and fungi from your mouth will happily set up camp on its surface.
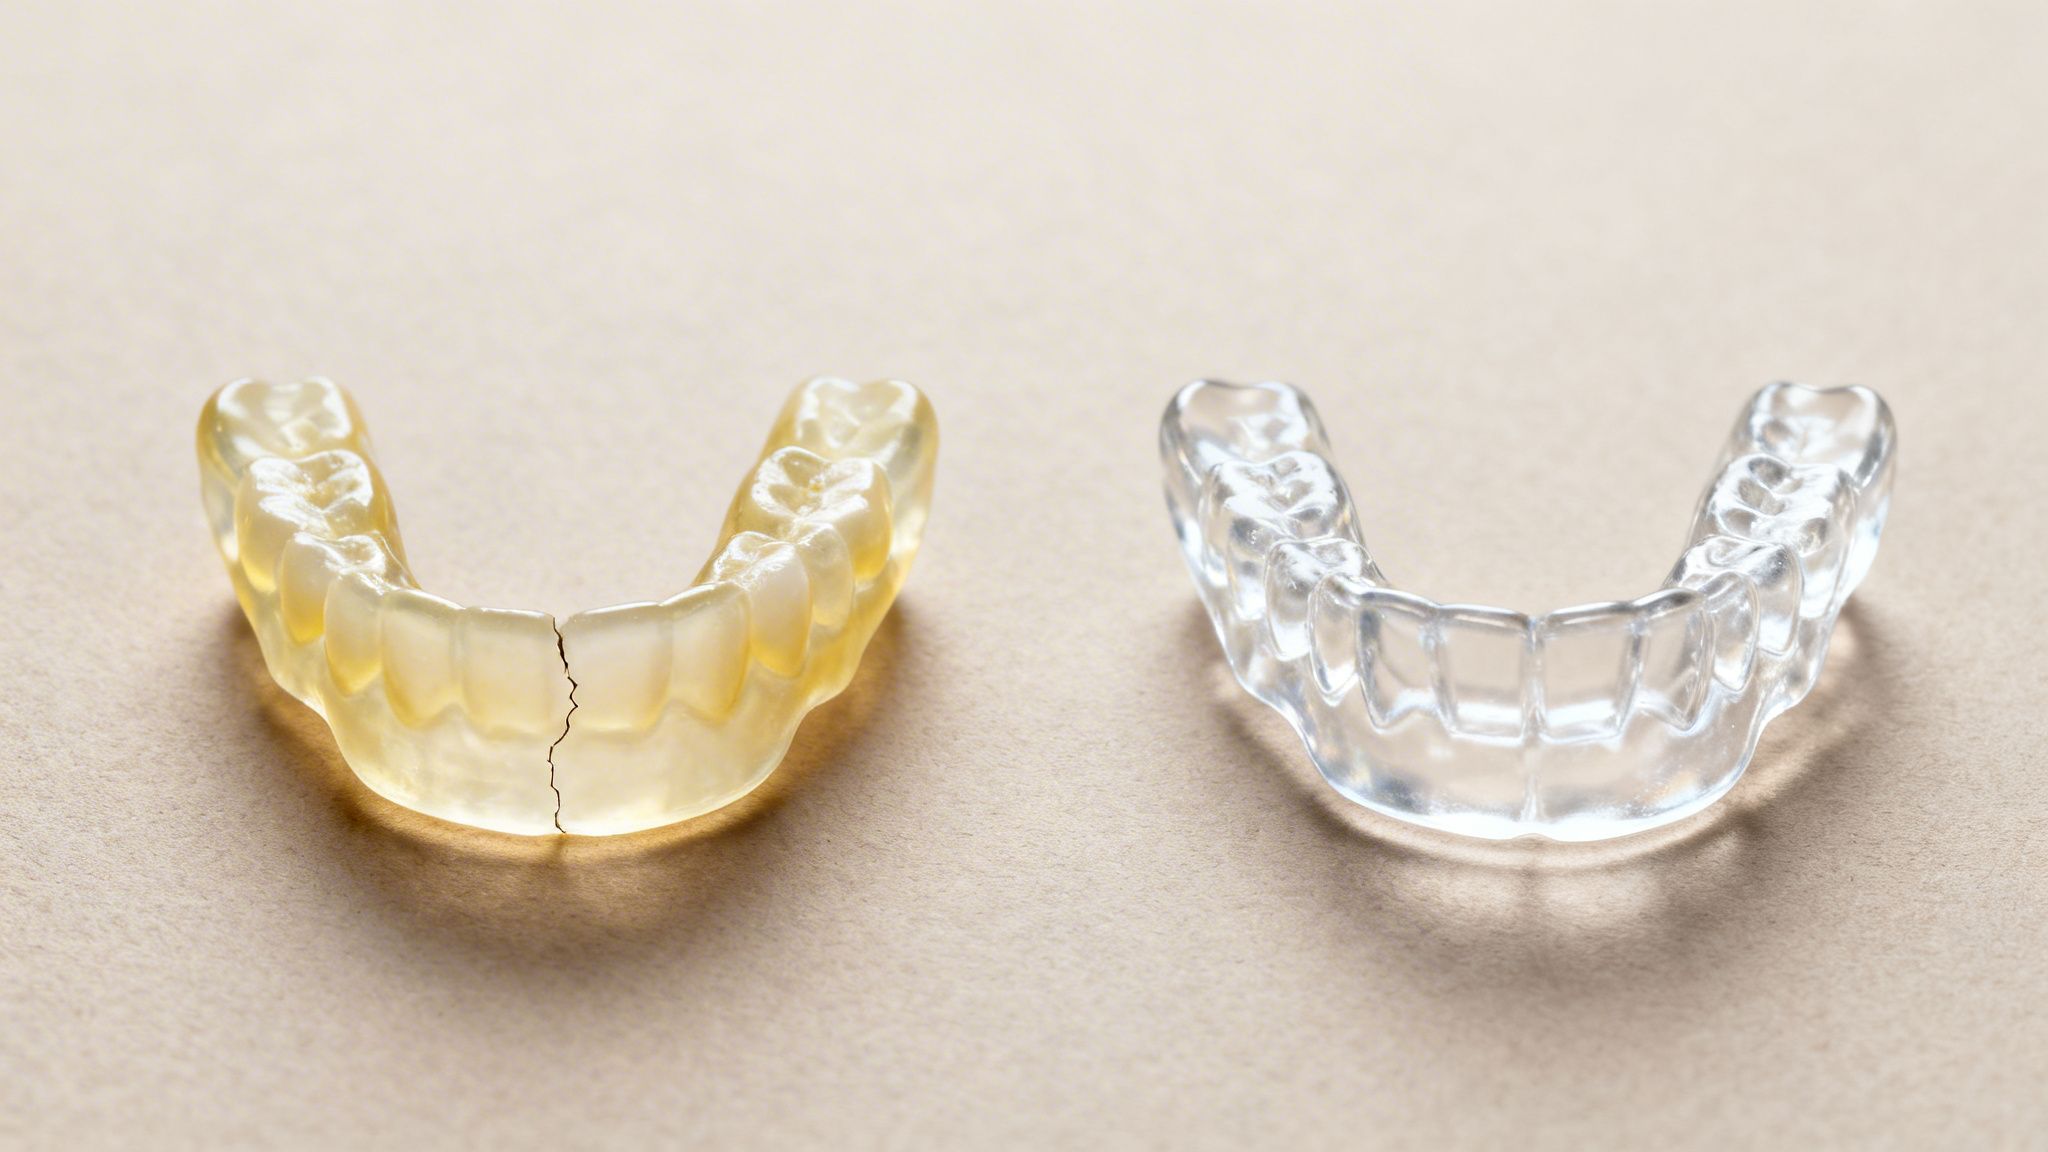
This buildup creates what’s known as a biofilm—a slimy, invisible layer of microbes. Over time, this film can calcify and harden, showing up as chalky white spots or making your once-clear splint look cloudy. This isn't just a cosmetic problem; it can slowly degrade the material and put your oral health at risk.
Why Proper Cleaning Is Non-Negotiable
A clean splint does more than just look and smell fresh. Taking care of your appliance is a simple habit that pays off for your health and your wallet.
Here’s why we always tell our patients to prioritise cleaning:
- Preventing Bacterial Growth: Your mouth is a complex ecosystem. A dirty splint gives harmful bacteria the perfect place to multiply, which you then pop straight back into your mouth every night.
- Avoiding Odours and Bad Breath: That bacterial buildup doesn’t just sit there quietly. It creates unpleasant smells and can be a direct cause of bad breath.
- Protecting Your Investment: Custom splints from a dentist like The Smile Spot are a valuable health investment. Proper care stops the material from getting brittle, discoloured, or warped, which makes it last much longer.
- Maintaining Oral Health: A contaminated appliance can increase your risk of gum inflammation, new cavities, and other oral infections.
Many of the same principles for keeping oral appliances clean apply across the board. The goal is always to remove bacteria and prevent mineral buildup, which is why a good routine is the best way to clean retainers and splints alike.
This guide will walk you through the simple, practical steps for a great cleaning routine. We’ll cover the quick daily clean you need to do every morning, plus the essential weekly deep clean. With the right habits, you can keep your splint fresh and functional for years to come.
The Essential Daily Cleaning Routine for Your Splint
Think of cleaning your splint as a non-negotiable part of your morning routine, just like brushing your teeth. It only takes a minute or two, but this simple daily habit is the single most important thing you can do to keep it fresh, clear, and free from bacteria.
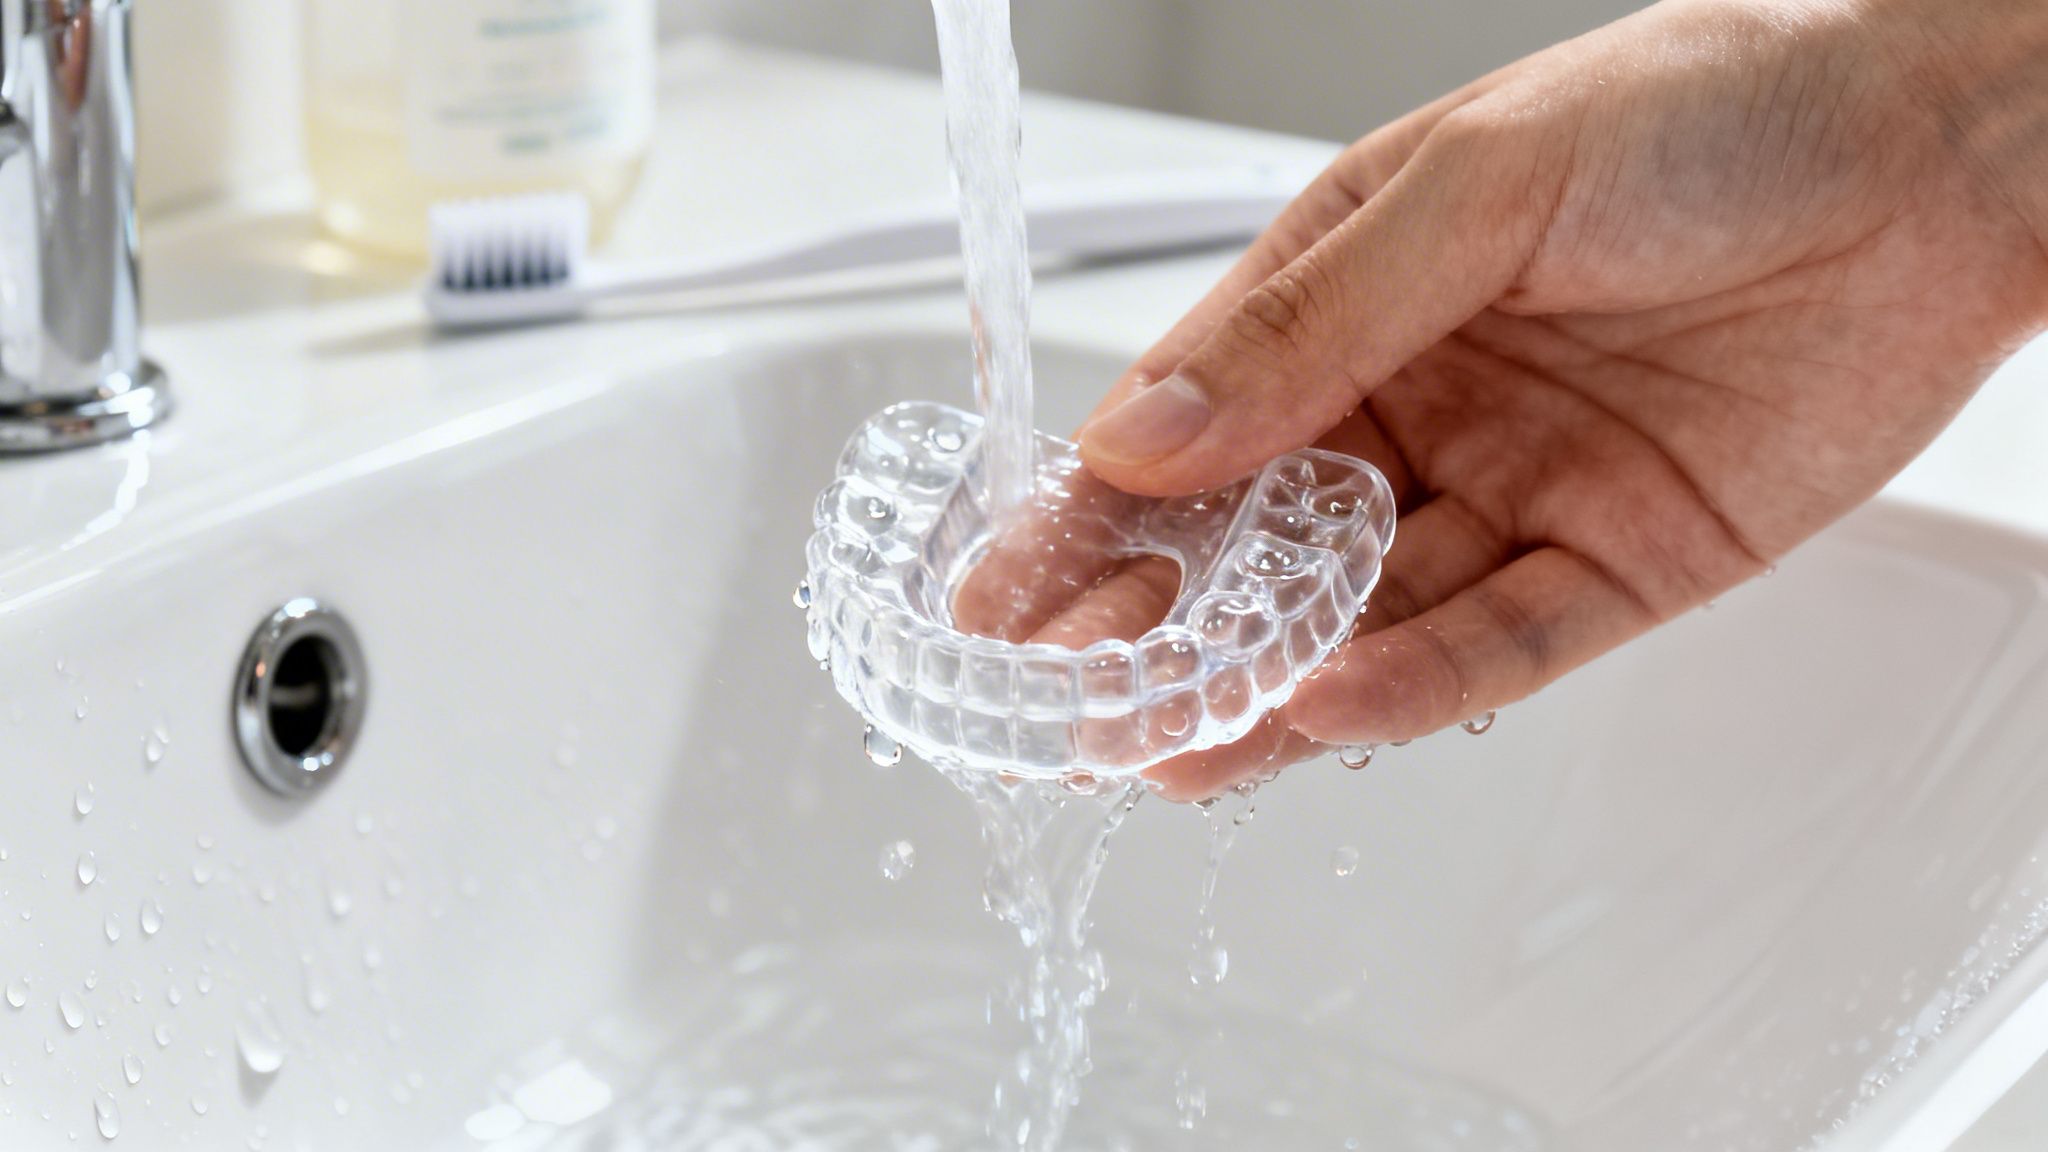
The moment you take your splint out, it's best to clean it right away. Rinsing it immediately prevents saliva and any overnight buildup from drying and hardening, making the job much easier.
The Rinse and Brush Method
Start by giving your splint a good rinse under cool or lukewarm running water. Never use hot water. High temperatures can warp the custom-moulded plastic, ruining its precise fit and making it uncomfortable and ineffective.
Next, grab a separate, soft-bristled toothbrush—one used only for your splint. Using your regular toothbrush can transfer bacteria back and forth between your teeth and the appliance.
It’s also important to skip the toothpaste. While it’s perfect for enamel, toothpaste is abrasive and can create microscopic scratches on your splint’s surface. These tiny scratches become a breeding ground for bacteria, leading to discolouration and odours over time.
Instead of toothpaste, you can use:
- A mild, unscented hand soap
- A simple, non-abrasive dishwashing liquid
- A specialised cleaner made for oral appliances
Gently brush every surface, inside and out. Pay close attention to the little nooks and crannies where bacteria love to collect. Once you’re done, give it one final, thorough rinse under cool water to remove all traces of the cleaner.
Don’t just rinse and forget it. Neglecting a daily clean is the fastest way to end up with a smelly, discoloured appliance. It only takes a minute, but it makes all the difference in preventing buildup and maintaining oral health.
The Importance of Proper Drying and Storage
Once your splint is clean, don't just pop it back into its case while it's still wet. A dark, damp, sealed container is the perfect environment for mould and bacteria to thrive.
Always let your splint air dry completely before putting it away. You can place it on a clean towel on your bathroom counter or in its case with the lid open. This simple step stops microbial growth and also keeps your splint safe from being accidentally knocked to the floor or found by a curious pet. You can find more about the importance of professional hygiene with our dedicated guide to teeth cleaning services in Dulwich Hill.
In Australia, research highlights the need for consistent hygiene. One study on oral appliances found that while most people own them, cleaning isn't always consistent, which can lead to bacterial build-up affecting over 80% of users if neglected. You can find more insights on this topic from research on dental splint care.
Effective Deep Cleaning Methods for a Hygienic Splint
While your daily clean is the first line of defence, a weekly deep clean is what truly disinfects your mouth splint and gets rid of that stubborn, microscopic buildup. Think of it this way: daily care handles the surface grime, but a deep clean targets the hardened mineral deposits and bacteria that can lead to odours and discolouration.
Luckily, you have a few easy and effective options you can prepare right at home to keep your splint in pristine condition.
This simple infographic breaks down the daily steps that form the foundation of good splint hygiene.
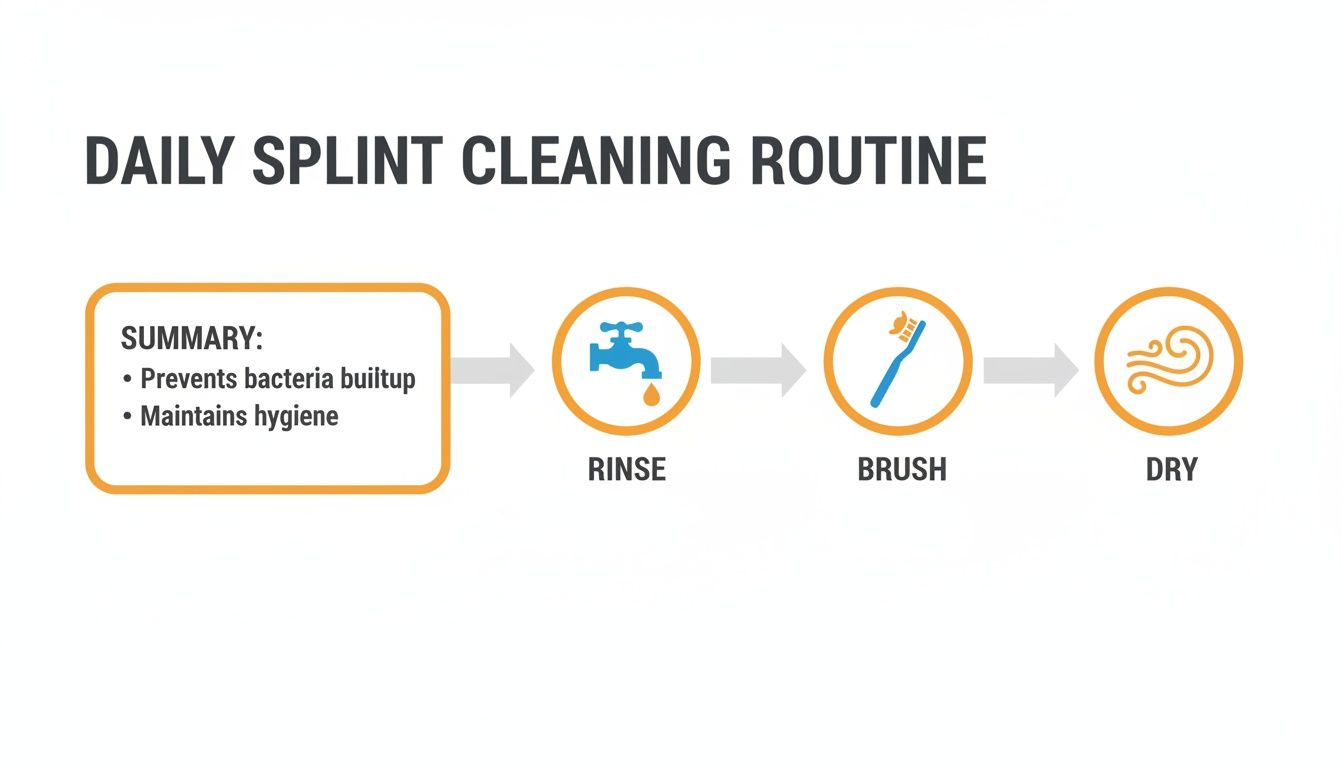
The main takeaway here is consistency. A daily routine of rinsing, gentle brushing, and letting your splint dry completely is what stops most bacteria from getting a foothold in the first place.
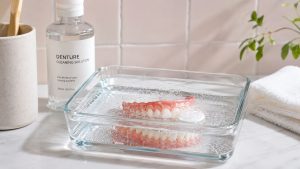
Deep Soaking Solutions for Your Splint
To get a really thorough clean, soaking is the way to go. One of the simplest and most effective methods is a diluted white vinegar solution. Just mix one part white vinegar with three parts cool water and let your splint soak for about 30 minutes. The acetic acid in vinegar is brilliant for dissolving those chalky mineral deposits (calcium) that build up from your saliva.
Another great option is using effervescent tablets, like the ones made for retainers or dentures. These are specifically designed to kill odour-causing bacteria and dissolve buildup without damaging the splint’s material. Just be sure to follow the packet instructions, as soaking times can differ between brands.
Don’t underestimate the power of a simple deep soak. This step is what separates a splint that looks clean from one that is genuinely hygienic. It’s the best way to tackle the buildup that a toothbrush can’t always reach.
It's interesting to see how attitudes have changed. Since practices like The Smile Spot opened in 1996, we’ve seen a clear shift in the Inner West towards more careful splint maintenance, especially as bruxism diagnoses have risen. Research backs this up, but also shows a surprising gap: while 98.4% of combat athletes clean their mouthguards, only 82.6% of team sports users do.
We recommend a deep clean every 2-4 weeks to help prevent the kind of premature wear and tear that can lead to failures, which some studies note in up to 40% of cases.
What to Use (and What to Avoid)
Choosing the right cleaning agent is crucial. Using the wrong product can damage the acrylic, leading to a poor fit or a rough surface that attracts even more bacteria.
Here’s a quick guide to help you make safe choices.
Safe and Unsafe Cleaning Agents for Your Mouth Splint
| Cleaning Agent | Why It's Safe/Unsafe | Recommended Usage |
|---|---|---|
| White Vinegar & Water | Safe: A natural disinfectant that effectively dissolves mineral buildup without harsh chemicals. | Soak for 30 mins in a 1:3 vinegar-to-water solution. |
| Denture/Retainer Tablets | Safe: Formulated to kill bacteria and remove stains on similar materials. | Follow packet instructions, typically a 15-30 minute soak. |
| Baking Soda Paste | Safe: A mild abrasive that neutralises odours and gently lifts surface stains. | Mix with water to form a paste and scrub gently. |
| Toothpaste | UNSAFE: Most toothpastes are too abrasive and will scratch the splint’s surface, creating tiny crevices for bacteria to hide in. | Never use toothpaste to clean your splint. |
| Mouthwash (with alcohol) | UNSAFE: Alcohol can dry out and damage the acrylic, making it brittle and prone to cracking. | Avoid soaking your splint in any mouthwash containing alcohol. |
| Hot Water/Dishwasher | UNSAFE: Heat can warp the custom-moulded shape of your splint, ruining its fit and effectiveness. | Always use cool or lukewarm water for rinsing and cleaning. |
At the end of the day, sticking to gentle, approved cleaners is the best way to protect your investment and ensure your splint lasts as long as it should.
A Note on Proper Disinfection
If you prefer a more hands-on approach, a paste made from baking soda and a little water works wonders. Gently scrub it over your splint with a soft brush. Baking soda is fantastic for neutralising acids and deodorising your appliance.
For those interested in the science behind getting things truly sanitary, understanding how to sterilize medical equipment can offer some valuable insights into what it takes to achieve clinical-level hygiene.
And remember, always bring your splint with you to your dental appointments. It allows our team to professionally check its condition and fit. You can learn more about our dental checkups in Dulwich Hill and book your next visit on our website.
Common Cleaning Mistakes to Avoid
Knowing the right way to clean your mouth splint is half the battle. Just as important is knowing what not to do. Many common, well-meaning habits can accidentally damage your appliance, reduce its lifespan, or even make it less hygienic.
Steering clear of these pitfalls is the best way to protect your investment and make sure your splint continues to do its job properly.
The biggest mistake we see people make is using hot or boiling water. While it seems like a great way to kill germs, the intense heat can permanently warp the acrylic or plastic. This distortion ruins the precise, custom fit your dentist worked hard to create, making the splint uncomfortable and completely ineffective.
Damaging Cleaners and Tools
Another critical error is turning to harsh, everyday cleaning products. Many of these can slowly degrade the material of your splint, causing it to become brittle and discoloured over time.
You should always keep these away from your splint:
- Bleach: This chemical is far too corrosive. It will break down the splint’s structure and should never be used.
- Alcohol-Based Mouthwash: Soaking your splint in mouthwash that contains alcohol will dry out the material, making it brittle and prone to cracking.
- Abrasive Toothpaste: Regular toothpaste contains tiny particles designed to polish tough tooth enamel. On a splint, these particles create thousands of micro-scratches that become a perfect breeding ground for bacteria.
Using these substances can cause irreversible damage, leading to a poor fit and discolouration. If your splint gets damaged, it might need an urgent fix. You can learn more about what to do in our guide on finding an emergency dentist in Dulwich Hill.
Using the wrong cleaning methods is a fast track to a damaged splint. A stiff brush and abrasive toothpaste might feel like they're giving a deep clean, but they're actually creating thousands of tiny scratches for bacteria to hide in.
Failing to clean your splint regularly is another significant risk. Australian dental sources have highlighted that poor splint hygiene can lead to bigger oral health issues. Some reports even suggest that 70% of splint wearers experience bacteria build-up when they skip weekly deep cleans. This fits with what we see in our own Inner West community, where consistent cleaning habits make all the difference. You can explore a comprehensive guide on splint cleaning to learn more about preventing these common problems.
Ultimately, consistency with the right methods is what matters most. Stick to lukewarm water, a soft-bristled brush, and a gentle, non-abrasive soap or a specialised soaking solution. This simple but correct approach will keep your mouth splint in pristine condition for years to come.
When to Replace Your Splint and Consult Your Dentist
Even with the most dedicated cleaning routine, your occlusal splint won’t last forever. Think of it like a good pair of running shoes—it absorbs a lot of impact and, over time, that wear and tear means it needs to be replaced. Knowing the signs that your splint is reaching the end of its life is just as crucial as keeping it clean day-to-day.
Using a worn-out splint can do more harm than good, so it’s important to know what to look for. How long your appliance lasts depends on a few things: the material it's made of, the intensity of your clenching or grinding, and, of course, how well you look after it.
Physical Signs of Wear and Tear
The first clues that you might need a new splint are usually visual. We recommend taking a moment to give it a good look over in bright light every time you clean it.
Here are the tell-tale signs of breakdown to watch for:
- Visible Cracks or Fractures: Even tiny hairline cracks can become a home for bacteria. They’re also a sign the splint is becoming brittle and could break completely.
- Significant Thinning: If you notice certain spots, especially on the biting surfaces, look or feel much thinner, the splint’s protective cushioning is compromised.
- Chips or Rough Edges: Any sharp or broken pieces are a red flag that the material is failing. These spots can also irritate your gums, tongue, and cheeks.
A splint’s main job is to absorb the incredible forces of grinding and clenching. After months or years of that nightly pressure, it’s only natural for the material to break down. Ignoring these signs is a bit like driving on bald tyres—it’s just a matter of time before it fails you.
Changes in Fit and Comfort
Beyond what you can see, pay close attention to how the splint feels in your mouth. A custom-made splint is designed to fit your teeth with incredible precision. Any change in that fit is a major signal that something isn’t right.
It’s probably time for a replacement if your splint starts to feel loose and no longer snaps securely into place. A poor fit means it can't distribute pressure evenly, which drastically reduces how well it protects your teeth. On the other hand, if it suddenly feels too tight or creates uncomfortable pressure points on certain teeth, the splint may have warped, or your bite may have shifted.
Persistent Odours or Stains
Have you noticed a stubborn bad smell or a yellow tinge that just won’t budge, no matter how well you clean it? This is often a sign that bacteria have worked their way deep into the material's micropores, creating a biofilm that surface cleaning can no longer remove. While good hygiene is key, there comes a point where even the best cleaning methods can’t fix deep-set contamination.
A persistent odour is a clear sign the bacterial load is too high, and continuing to wear the appliance could start to negatively affect your oral health.
Ultimately, your dentist is your best guide. We always recommend bringing your splint along to your regular check-ups. Our team at The Smile Spot can professionally assess its condition and fit, giving you clear advice on when a replacement is needed. To get a complete evaluation of your splint and overall oral health, you can schedule a visit with your trusted dentist in Dulwich Hill.
Frequently Asked Questions About Mouth Splint Care
Even with the best daily cleaning habits, questions about looking after your mouth splint are bound to pop up. We get them all the time at The Smile Spot. Knowing how to handle these common situations helps protect your investment and, more importantly, your oral health.
Here are our answers to some of the most frequent queries we hear from our patients.
Can I Use Toothpaste on My Splint in a Pinch?
You're away for the weekend and realise you’ve forgotten your splint cleaner. Is it okay to just use your toothpaste?
While it’s definitely better than nothing, using toothpaste is not recommended for cleaning your splint. The problem is that most toothpastes are abrasive; they're designed to scrub stains from tough tooth enamel. Your splint, however, is made from a much softer acrylic or plastic.
These abrasives create micro-scratches on the surface. You can't see them, but they create the perfect hiding place for bacteria to thrive. If you’re really in a bind, use a tiny, pea-sized amount of a non-whitening, non-gritty gel toothpaste and rinse it extremely well. But you'll want to get back to a proper non-abrasive cleaner as soon as you can to prevent long-term damage.
A single use won’t ruin your splint, but making it a habit will. Think of it like using a harsh kitchen scourer on a non-stick pan—it might get the job done once, but you're damaging the surface over time and making it much harder to clean later on.
What if My Splint Develops a Funny Taste or Smell?
If your splint has started to taste a bit off or has an unpleasant odour, it's a clear sign of bacterial buildup. That taste is the byproduct of bacteria that have set up camp on the surface.
This is your splint’s way of telling you it’s overdue for a proper deep clean. A simple brush and rinse won’t cut it.
A good soak is the most effective way to sort it out:
- Vinegar Solution: Soaking it for 30 minutes in a mix of one part white vinegar and three parts water works wonders for neutralising odours and dissolving mineral buildup.
- Effervescent Tablets: Specialised retainer or denture cleaning tablets are designed to kill odour-causing bacteria and leave your appliance feeling fresh.
After the soak, give it another gentle brush and a thorough rinse. The taste and smell should be gone, which tells you your splint is hygienically clean again.
How Often Should I Get My Splint Checked?
It's really important to think of your splint as part of your overall dental care, not a separate gadget. That's why you should bring your splint with you to every routine dental appointment—for most people, that’s every six months.
This lets our dentists at The Smile Spot do two crucial things. First, we can give it a professional clean to remove any stubborn tartar that your home cleaning might have missed. More importantly, we can inspect it for wear and tear, check the fit, and make sure it’s still doing its job of protecting your teeth. Your bite can shift over time, or the splint itself can wear down, so these regular check-ups ensure it stays both safe and effective. It's also a great chance to ask any questions you have.
You can get a clearer idea of what a check-up involves by reading about our dentist fees and charges in the Inner West.
At The Smile Spot, we're committed to ensuring your mouth splint serves you well for years to come. If you have any concerns about your splint's fit, condition, or cleaning routine, don't hesitate to book an appointment with our team in Dulwich Hill. Visit us online at https://thesmilespot.com.au.


")


