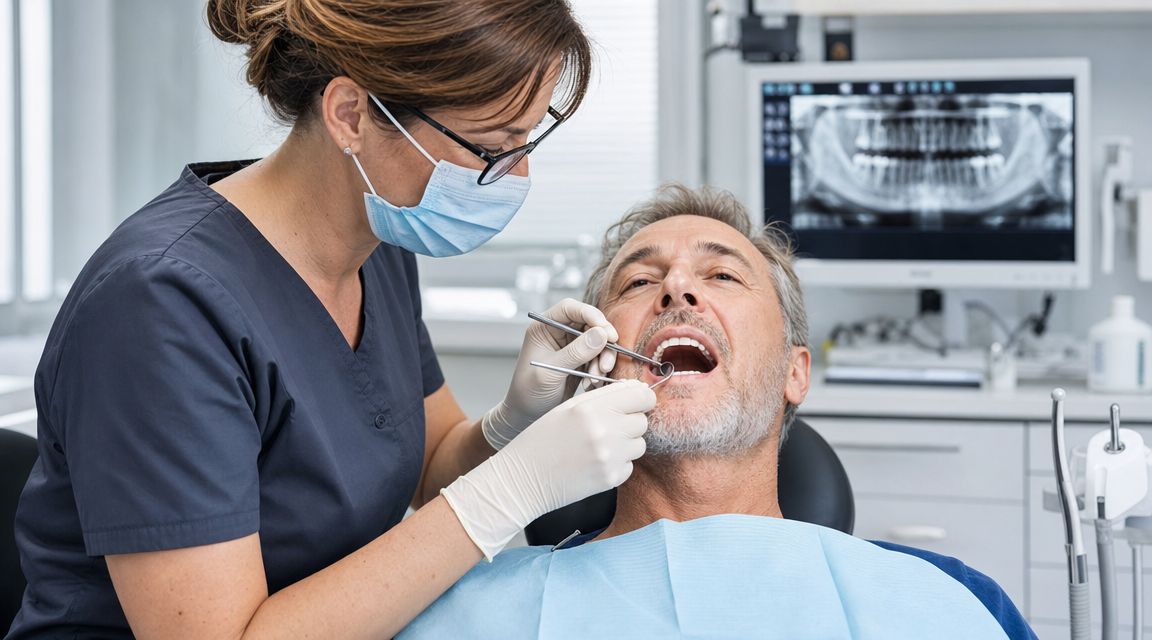
You've got your new smile. You can eat more comfortably, speak with more confidence, and stop thinking about loose dentures or missing teeth every time you laugh. Then the practical question arrives the first night at home. How do you keep All-on-4 clean without damaging it?
That question matters. A fixed full-arch bridge doesn't behave like natural teeth, and it doesn't clean like them either. Food, plaque and biofilm collect in places a standard brushing routine will not reach, especially underneath the bridge and around the implant connection points. The good news is that once you learn the right sequence, daily care becomes much more straightforward.
If you're searching for how to clean All on 4 dental implants, the goal isn't to scrub harder. It's to clean smarter, target the right areas, and build a routine you can stick to every day.
Your New Smile Deserves the Best Care
The first week with an All-on-4 bridge often goes like this. You look in the mirror, love what you see, then pause at the sink and realise your old brushing habits are no longer enough. That moment matters, because good home care protects far more than appearance. It protects the gums and implant surfaces that hold your new smile in place.
Daily plaque removal remains the basis of long-term implant maintenance. Clinical guidance on implant care supports cleaning twice a day with a soft toothbrush and using tools that can reach around the prosthesis and abutments, such as floss, interdental brushes, or water irrigation (clinical review on implant maintenance). The practical point is straightforward. A full-arch bridge has sheltered areas underneath and along the gumline, and those areas need gentle, targeted cleaning.
If you are still learning how the treatment is built, our guide on what All-on-4 dental implants are explains the structure behind the bridge and why cleaning feels different afterwards. I also recommend reading your Katy guide to dental implants if you want a simple overview of the wider implant process before focusing on maintenance.
What daily care is really protecting
An All-on-4 bridge cannot get a cavity, but the tissue around the implants can still become irritated or infected if biofilm stays in place day after day. In practice, I see two problems more than anything else. Some patients miss the underside of the bridge because they only clean what they can see. Others scrub too aggressively and leave the gums sore, which makes the next cleaning session harder to do well.
Good care sits in the middle. Clean thoroughly, but clean gently.
That is why I tell patients to judge their routine by access and consistency, not force. If hand strength is limited, the answer is not to brush harder for longer. The answer is to use tools and angles that reach under the bridge without scraping the tissues. This approach helps patients who have arthritis, reduced dexterity, or tenderness after treatment keep the area clean without turning oral hygiene into an exhausting job.
A simple rule helps. Clean the hidden surfaces as carefully as the visible ones, and stop short of anything that causes repeated irritation.
Gathering Your All-on-4 Cleaning Toolkit
The best cleaning routine starts before you stand at the sink. It starts with having tools that suit the shape of your bridge, the sensitivity of your gums, and your own hand control. Many people buy too little, then compensate by brushing too hard. That usually creates irritation rather than a cleaner prosthesis.
The core tools that actually earn their place
You don't need a drawer full of gimmicks. You do need a few reliable basics:
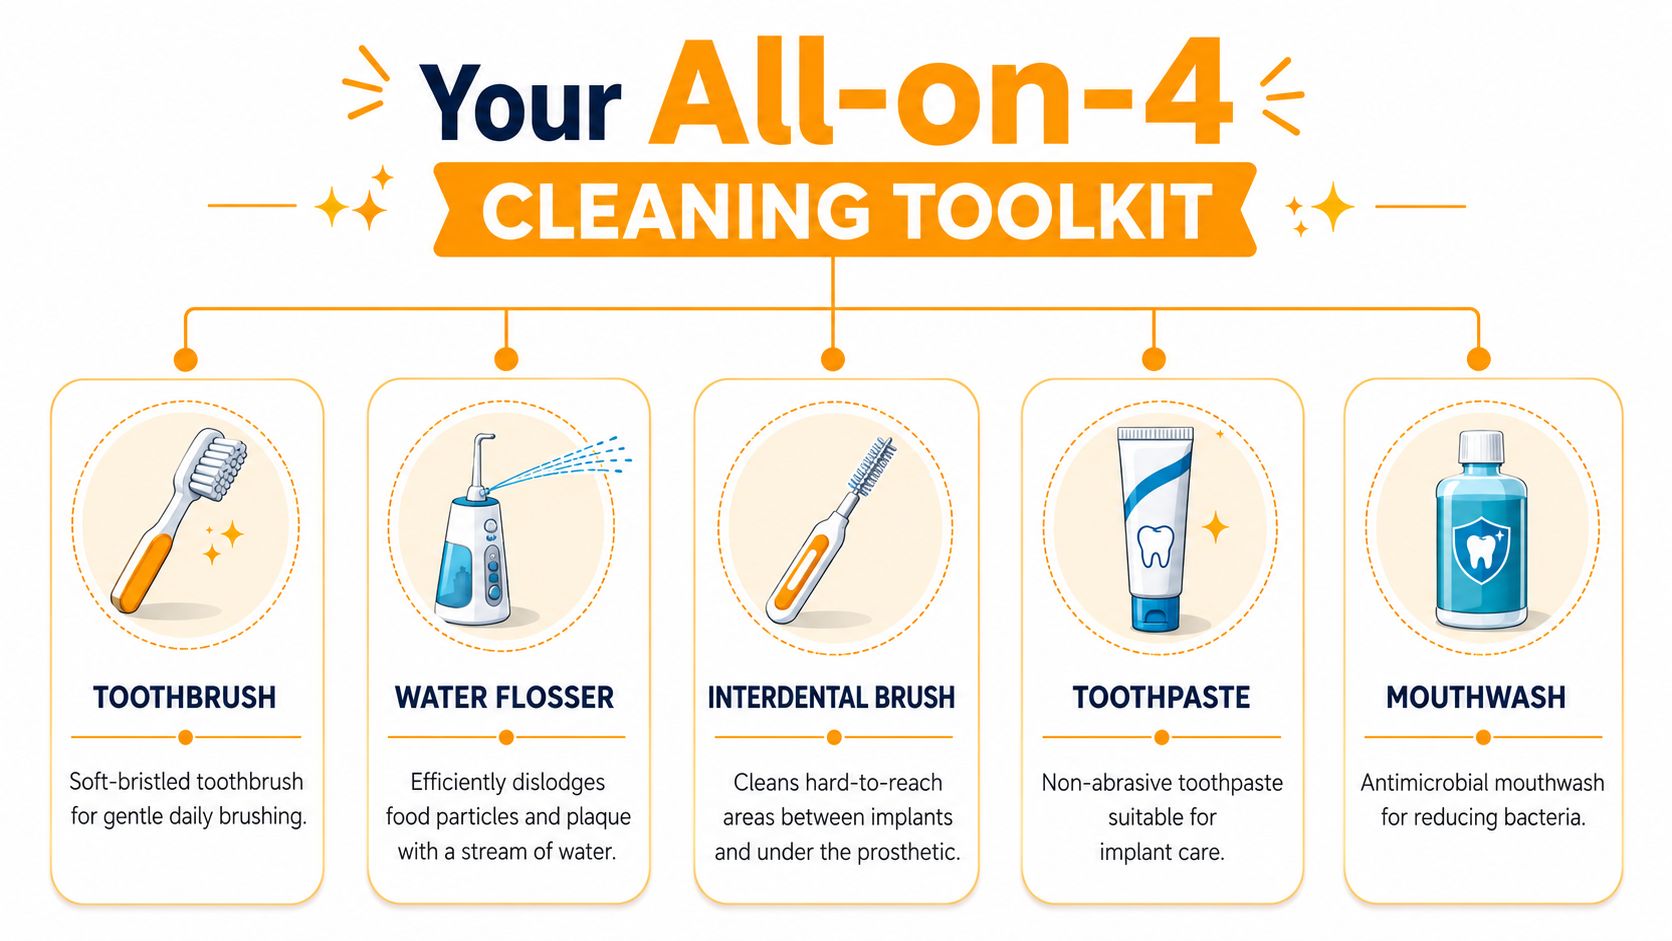
- Soft-bristled toothbrush. This is for the visible surfaces of the bridge and the gumline. A manual brush can work well, but many patients do better with an electric brush because it reduces the effort needed to maintain a consistent technique.
- Non-abrasive toothpaste. This helps clean without roughening the prosthetic surface. If a toothpaste feels gritty or is heavily marketed for whitening, it's usually not my first choice for implant work.
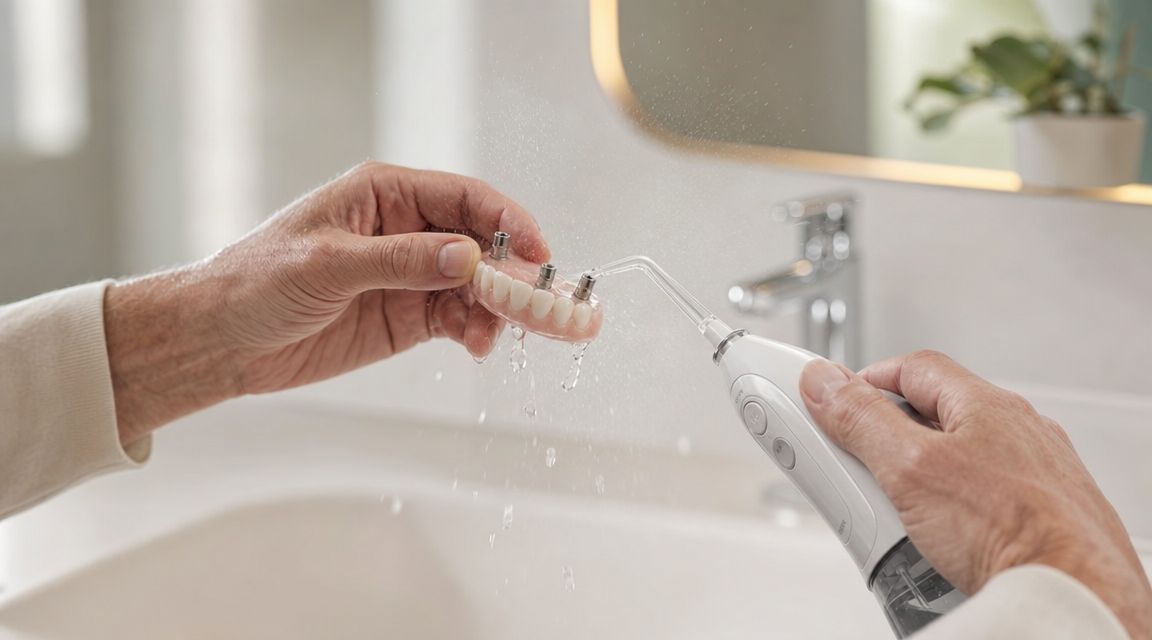
- Water flosser. This is often the easiest way to disturb loose debris under the bridge before you do more precise cleaning.
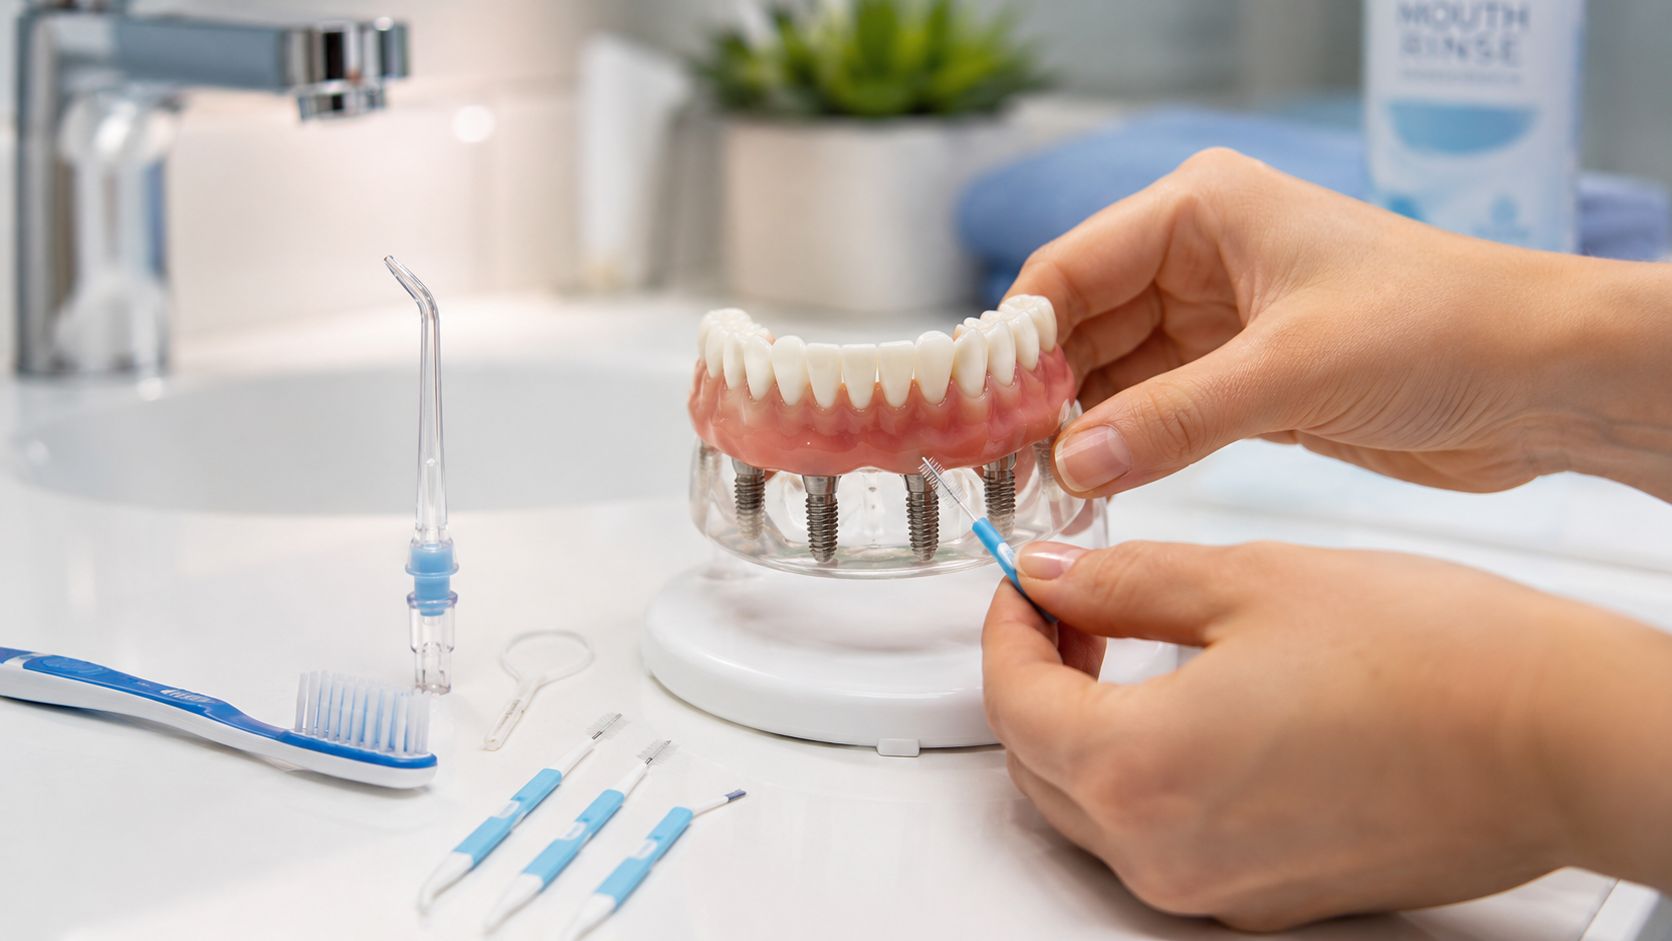
- Interdental brushes. These are useful for the spaces around the abutments and under bridge contours where a larger brush head can't reach.
- Floss threaders or sponge floss. These are slower than a water flosser but can be excellent for detail cleaning once you've learned the technique.
- Alcohol-free rinse. This can freshen the mouth and complement mechanical cleaning without the harsher feel of alcohol-based rinses.
Choosing tools when dexterity is limited
A common failing of many guides is not recognizing that not everyone has steady hands, strong grip, or easy shoulder movement. A sustainable routine matters more than an ideal routine that you can't maintain.
Guidance on implant cleaning often notes the challenge for older adults and others with arthritis, tremor, limited reach, or reduced hand strength. The practical focus should be on making the routine feasible, not just theoretically perfect (implant cleaning guidance for dexterity challenges).
If dexterity is an issue, these adjustments usually help:
- Use a water flosser as the first-line tool on low-energy days when threading floss under the bridge feels unrealistic.
- Choose a thicker brush handle or add a grip aid so your hand doesn't have to pinch tightly.
- Use an electric toothbrush if circular hand motions are tiring or inconsistent.
- Keep tools in one place so the routine feels simpler and less frustrating.
- Ask for caregiver help if you can't reliably reach the underside of the bridge.
A routine you can repeat every day beats an ambitious routine you abandon after a week.
If you already use oral appliances and want another example of choosing tools around comfort and wear, our article on how to clean a mouth splint follows the same principle. Gentle care preserves the appliance and makes daily maintenance easier.
Your Daily and Weekly All-on-4 Cleaning Routine
A good routine has an order to it. Start by loosening debris. Then clean the areas under the bridge and around each implant post. Finish by brushing the visible surfaces and gumline. That sequence works better than brushing first and hoping the rest sorts itself out.
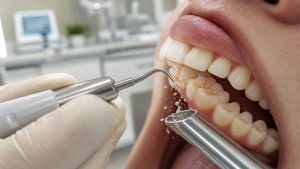
A practical protocol is to use a water flosser first, then interdental brushes or floss threaders under the bridge, and finish with a soft-bristled toothbrush and non-abrasive toothpaste. The highest-yield areas are the underside of the arch and the spaces around each implant post (step-by-step All-on-4 cleaning guidance).
Twice daily routine
For most patients, morning and night is the right rhythm.
Start with the water flosser
Aim under the bridge and along the gumline to flush away loose food particles before they compact further into tight spaces.Use interdental brushes or a floss threader
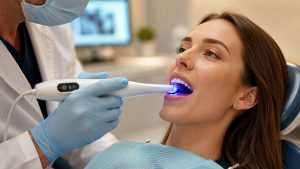
Work under the bridge and around the implant support areas. Use gentle in-and-out motions rather than forceful scraping.Brush with a soft toothbrush and non-abrasive toothpaste
Clean the outside, inside, and biting surfaces of the prosthesis, then focus on the gumline where plaque tends to settle.Finish with an alcohol-free rinse if recommended
This isn't a substitute for mechanical cleaning, but it can be a useful final step.
Angle matters more than pressure. Direct the cleaning tool toward the underside of the bridge and tissue margin, not straight across the visible teeth.
Weekly check-in
Once or twice a week, slow down and inspect your technique as opposed to repeating it. Look in the mirror and check whether you're reaching the back corners, the underside of the arch, and the spots around each implant connection.
That's also the right time to replace worn interdental brushes, clean your water flosser tip, and notice early signs of irritation. If you rush through the same pattern every day, you'll often miss the same areas every day too.
All-on-4 Cleaning Schedule at a Glance
| Frequency | Task | Key Focus |
|---|---|---|
| Twice daily | Water flosser | Loosen debris under the bridge and along the gumline |
| Twice daily | Soft brushing with non-abrasive toothpaste | Clean exposed prosthesis surfaces and tissue margin |
| Daily | Interdental brush or floss threader | Reach around implant posts and under the arch |
| Weekly | Visual self-check | Spot missed areas, irritation, or worn tools |
If you'd like a broader preventive mindset around keeping restorations and supporting tissues healthy, our article on preventive dental care is worth reading alongside your implant routine. For another outside perspective, these dental implant care tips are useful for comparing general implant habits with full-arch maintenance.
A short demonstration can also help if you learn best by watching technique rather than reading about it.
Common Mistakes and Products to Avoid
Most mistakes come from good intentions. Patients want their bridge to feel spotless, so they brush harder, buy stronger products, or add sharp tools that seem efficient. That usually backfires.
Clinical guidance is clear on one point. Technique and tool choice matter more than force, and gentle, consistent, correctly targeted cleaning is preferred over aggressive brushing because over-cleaning can irritate tissues or damage surfaces (guidance on gentle implant cleaning).
Products that cause problems
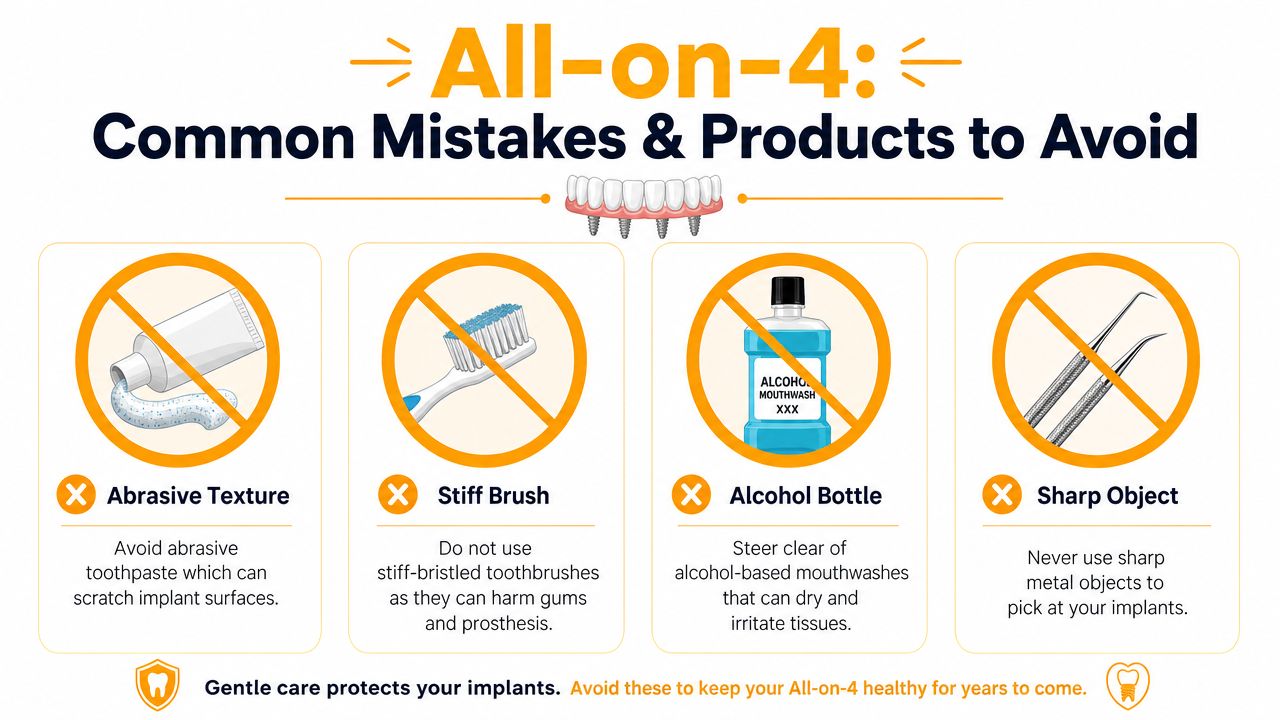
A few products routinely create trouble:
- Abrasive whitening toothpaste. These can roughen the prosthetic surface and make maintenance harder over time.
- Hard or stiff-bristled brushes. They don't make you cleaner. They make you sore.
- Alcohol-based mouthwash. These can feel strong and “clinical”, but they may irritate peri-implant tissues.
- Sharp metal picks or household objects. Never use these to dig food out from under the bridge.
The over-cleaning myth
Patients often assume that bleeding or soreness means they should clean even harder. Usually, that's the wrong response. If tissue is irritated, step back and assess your method. Are you pressing too firmly? Are you forcing an interdental brush that's too large? Are you using a gritty toothpaste because it feels more powerful?
If your gums feel battered after cleaning, the routine needs adjustment. It doesn't need more aggression.
Persistent inflammation around implants deserves professional review, especially because peri-implant tissue problems can begin subtly. If you're interested in how gum inflammation is managed clinically, our article on laser periodontal therapy explains one part of the bigger picture.
Why Professional Maintenance Is Non-Negotiable
A common pattern shows up a few months after treatment. A patient feels comfortable, the bridge feels secure, daily cleaning seems to be going well, and it is easy to assume that home care is enough. Then at a review, we find hardened deposits tucked around access points, early tissue irritation, or a spot under the bridge that has been missed because it is awkward to reach.
That is normal. It does not mean you have failed. It means All-on-4 maintenance has limits at home, even with a careful routine.
Professional visits matter because we are checking more than visible cleanliness. We assess the gum tissue around each implant, look for early signs of peri-implant disease, examine the fit and condition of the bridge, and identify areas where your current routine may be too aggressive or not reaching well enough. This is especially important for patients with arthritis, reduced hand strength, or limited dexterity, because the goal is not perfect technique every single day. The goal is a routine you can keep up gently and consistently, with professional care filling in the gaps.
What a maintenance visit adds
A proper implant maintenance appointment allows your clinician to:
- Check for early inflammation before it becomes painful or more difficult to treat
- Remove buildup in areas you cannot safely reach at home
- Use implant-safe instruments and polishing methods that protect the prosthesis and implant components
- Adjust your home routine if certain tools, angles, or steps are not practical for you
- Monitor wear, bite pressure, and plaque traps that can make cleaning harder over time
That last point matters more than many patients expect. I often find that the problem is not lack of effort. It is a small design feature, a worn brush head, a cramped angle under the bridge, or a routine that is too complicated to maintain on tired days.
Why implant maintenance is different from a routine scale and clean
All-on-4 maintenance is not handled exactly like care for natural teeth. The materials are different, the contours are different, and the risks are different. If you want a general overview of the difference between cleanings deep cleanings and scaling, that comparison is helpful. Full-arch implant maintenance sits in a separate category because the bridge and implant surfaces require a more specific approach.
Our guide to professional teeth cleaning for ongoing oral health maintenance gives more context on what these visits are designed to catch early.
For patients, the practical takeaway is simple. Daily home care protects your investment. Regular professional review helps keep small issues small. Used together, they give your All-on-4 the best chance of staying comfortable, clean, and stable for the long term.
Answers to Your Top All-on-4 Cleaning Questions
Is it normal for food to get trapped under the bridge
Yes. Some food collection is common with a fixed full-arch prosthesis because there's space beneath the bridge where debris can lodge. That doesn't mean something is wrong. It means your routine needs to target underneath the arch every day.
What should I do if my gums bleed when I clean
Don't panic, but don't ignore it either. First check your technique. Use less pressure, make sure your brush is soft, and confirm that your interdental brush isn't too large. If bleeding continues, arrange a professional review rather than trying to scrub the area into submission.
Can I use whitening toothpaste
It's better to avoid abrasive whitening products on All-on-4 restorations. A smoother prosthetic surface is easier to maintain, and gritty formulas can work against you.
Is a water flosser enough on its own
For some patients, especially those with dexterity challenges, a water flosser may become the main tool on difficult days. But in most cases, it works best as part of a sequence rather than as the only step. It loosens and flushes debris well, but detail cleaning around the implant posts often still benefits from an interdental brush or threaded floss.
What if cleaning feels too difficult to keep up
Simplify before you give up. Keep your tools visible, use an electric brush, and lean more heavily on a water flosser if hand skills are limited. If reaching under the bridge is consistently difficult, ask your dentist to adapt the routine to what you can manage.
If you'd like personal guidance on caring for your All-on-4 bridge, The Smile Spot can help you build a routine that fits your mouth, your dexterity, and your day-to-day life. Whether you need an implant check-up, a professional clean, or advice on the right tools, the team can help you protect your new smile with practical, gentle care.


")


